Prototyping with LEGO

LEGO bricks are small plastic building pieces designed to connect securely yet be easily taken apart. Each brick has:

  • Studs on top (small round bumps)

  • Tubes underneath that grip the studs of another brick

  • Standardized dimensions, allowing pieces made decades apart to fit together precisely

They are typically made from a durable plastic, which gives them strength and slight flexibility. Bricks connect by pressing one onto another. The friction between studs and tubes holds structures together. Because all pieces follow a grid system, you can build in 2D layers or extend upward into 3D structures.

Because of this consistency and ease of use, LEGO bricks can serve as a basic tool for physical prototyping in 3D modeling: they allow rapid construction, modification, and visualization of forms, helping users explore proportions, spatial relationships, and simple structural concepts before translating ideas into digital models.

In this exercise, we will build on the the designs created in the Two-Dimensional Design and Creating Bead Mosaic thread.

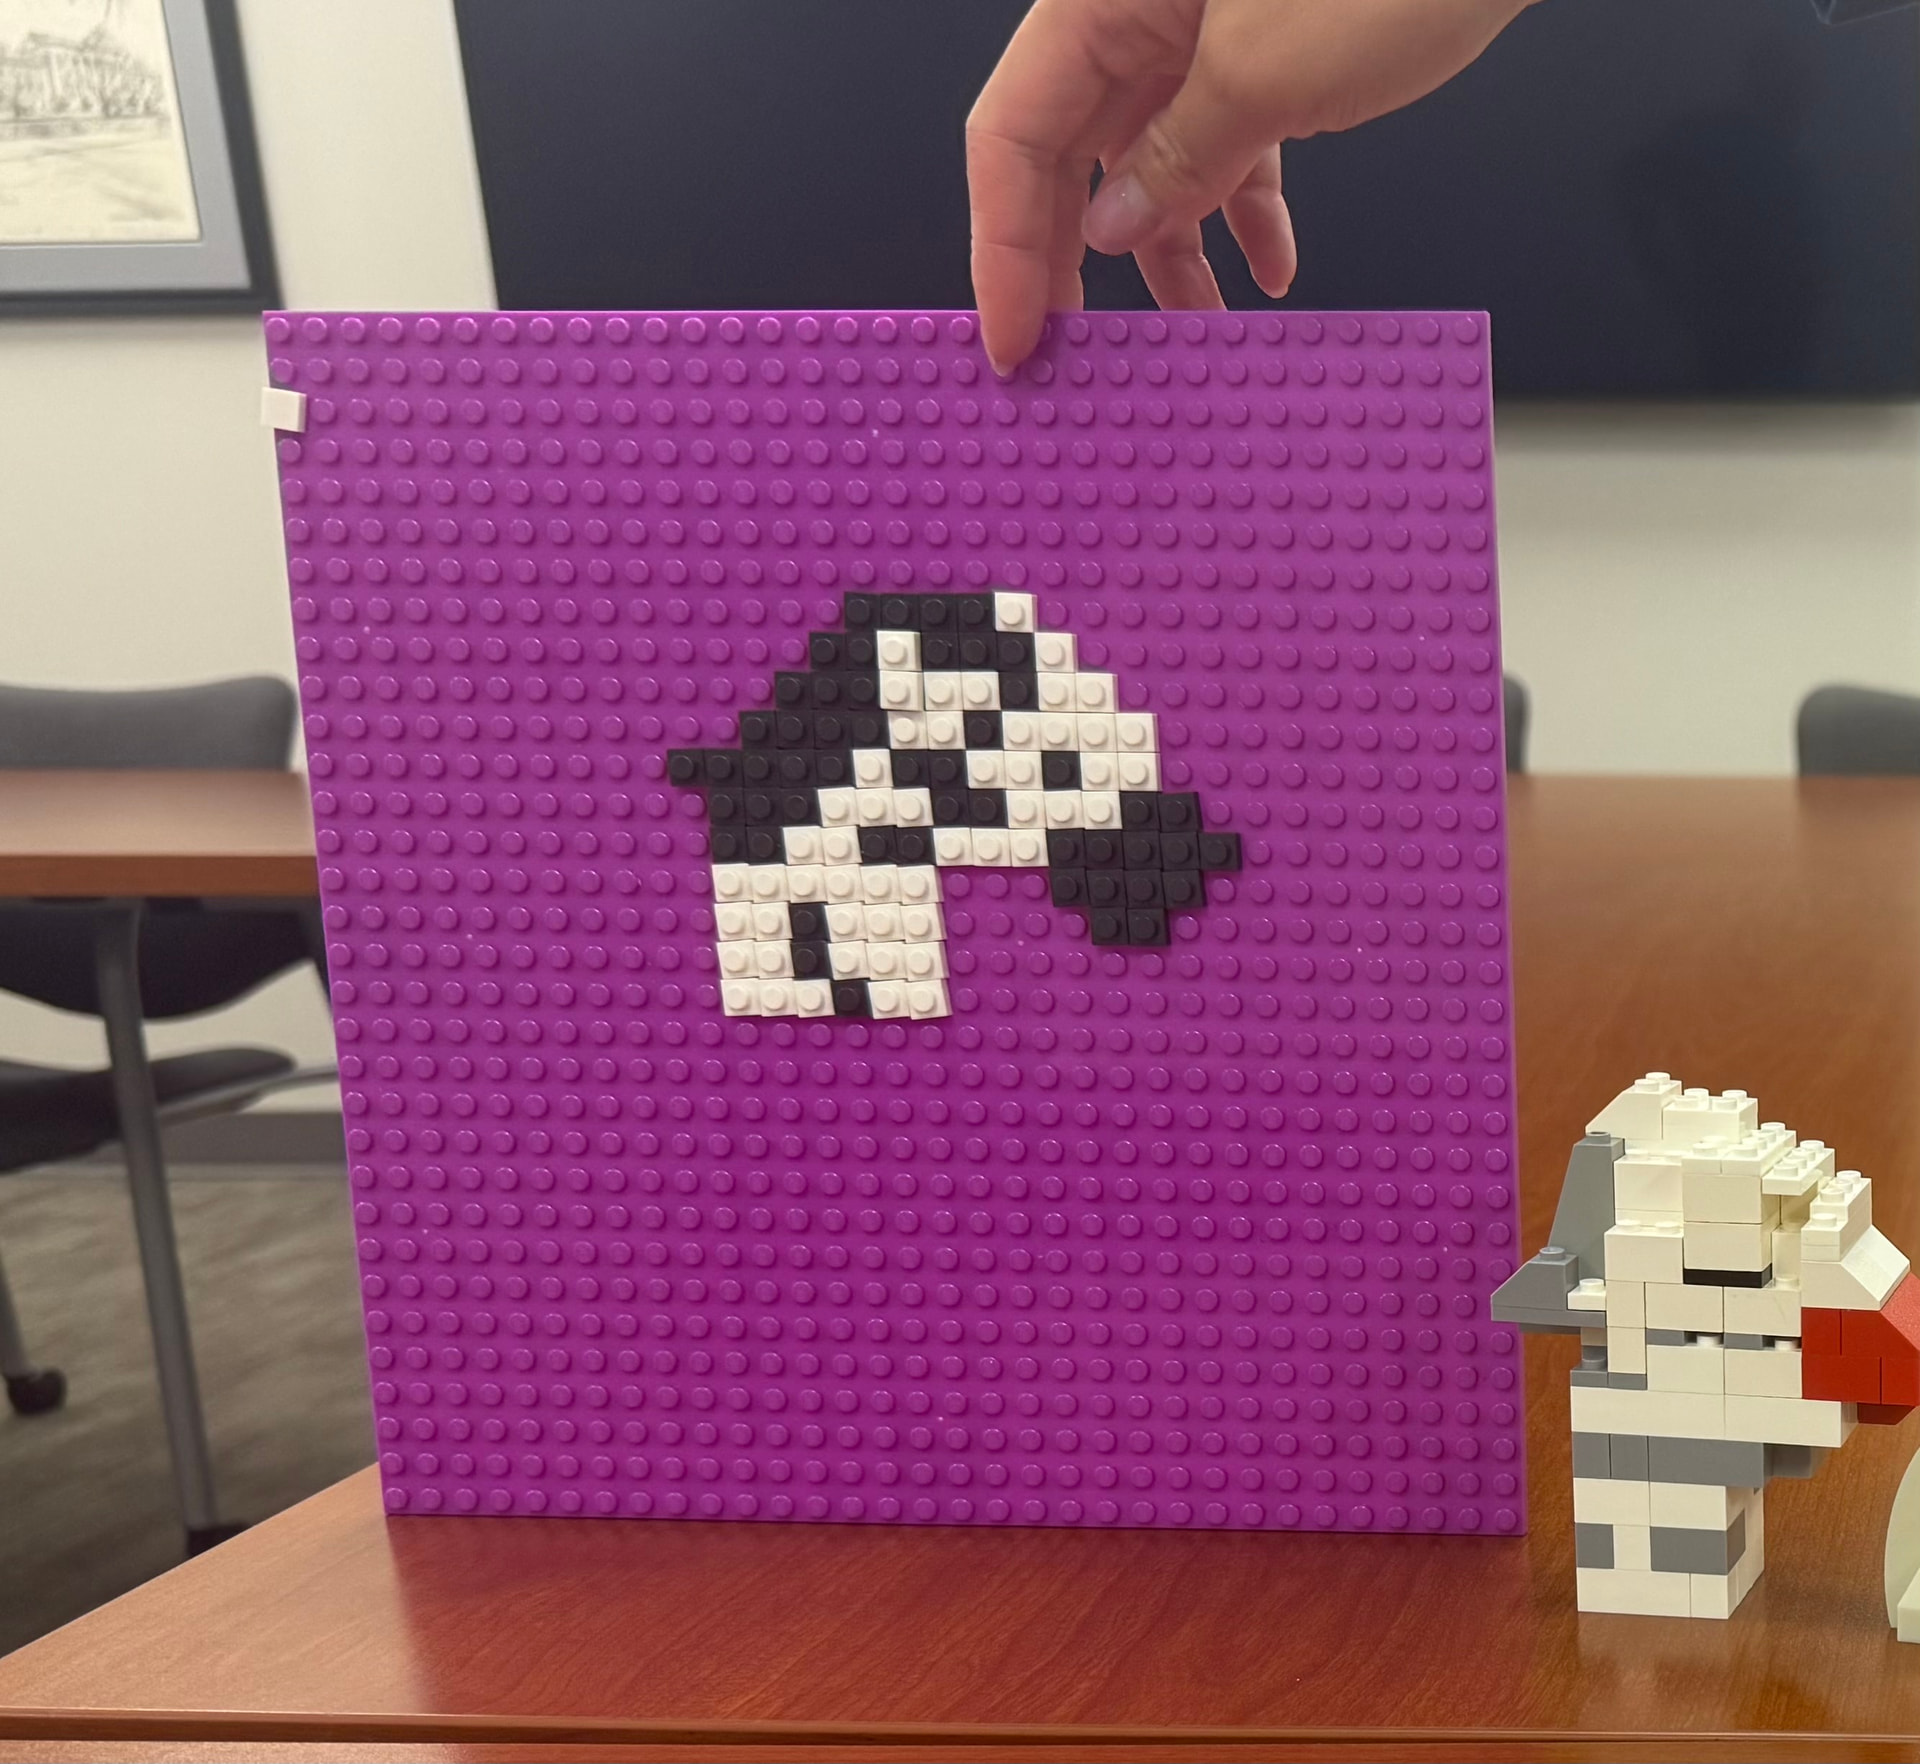
You can use a LEGO baseplate and 1x1 LEGO tiles to replicate the mosaic. This will provide a reference for subsequent creation of a three-dimensional model. Below is an image of the crested crane LEGO mosaic.

By taking a picture of the LEGO mosaic and uploading it to an AI image generator like ChatGPT or Gemini, you can prompt the AI to create a 3D representation. The image below was by uploading the mosaic photo to ChatGPT with the prompt:

“Generate an image of a crested crane built from LEGO bricks. Use the attached image of a LEGO mosaic as a reference. The mosaic is made using 1x1 lego tiles on a grid.”

The image created by AI will likely include LEGO parts that do not exist, impossible to build geometries. When building the 3D version of the crane, the goal is not to replicate the AI generated image. Instead, the image is used as a reference to gauge general shape, proportion, and positioning. The designer must work with the bricks available to create the best approximation of the AI generated model. One resulting interpretation is the actual LEGO model depicted below.

This workflow mirrors one of the more common techniques used in three-dimensional design. Before creating a 3D model, designers frequently begin with a two dimensional sketch.

1 Like

Julia Skinner and Claire Mills:

East African Hippo - 2D and 3D Models

Here is our 2D and 3D hippos! We opted for a side view of the hippo for the 2D lego model because it gave us more realism in comparison to our bead work of the more cartoon hippo. We wanted our end goal to be a more realistic 3D hippo, so starting this way gave us room to explore our ideas. While creating the 2D model, we found difficulty in finding the shape we wanted because the hippo is very round, and Legos are very square. We wanted to add jaws, but found it to be too tricky in the 2D landscape. Also, working with little color gave us little room for dimension in that department. Here is our inspiration for the 2D model that Gemini gave us:

For the 3D model, we focused heavily on creating moveable jaws and a more realistic head that made it more recognizable as a hippo rather than other 4-legged creatures. The hippo has a very distinguishable jaw and teeth, and we wanted to emphasize this. We found difficulty in finding enough grey Legos and ones that gave curvature to our hippo’s round body. Though not all match, we found enough that gave it the hippo illusion. Finally, our tail was very stubborn. It falls off very easily and we want to design a better one in the future for our final hippo design! Here is our 3D hippo inspiration, also from Gemini:

I hope you enjoy our pictures and creative process!

1 Like

Lego Elephant 3D
By: Billy Ganbold
For this project, I took our 2D elephant and turned it into a 3D Lego model. I kept the same silhouette and color palette, but dropped the dark outlines because it just felt unnecessary, and the build looked cleaner without them.

Going from a flat drawing to actual bricks was harder than expected. Getting the proportions right meant building in separate sections so everything could move and fit together properly. Finding pieces the right size to match the drawing while still keeping them stable took some trial and error. I ended up being able to connect the pieces in the end to keep it structurally sound, but the trunk and tusks are still a little loose.

For my mosaic, I decided to choose a bunny. I took a picture of the green baseplate and one singular 1x1 LEGO tile. From here I asked AI to create a mockup of a simplified 2d bunny out of similar sized lego tiles to use as a reference. The Ai’s creation helped in giving me a rough idea of how to outline the bunny and what colors to use.

After a picture of my completed LEGO mosaic, I uploaded to ChatGPT and prompted it to create a realistic 3d mockup of a bunny. The picture was not realistic with pieces we did not have, and structures that would not be possible, so I decided to try my best at recreating the bunny myself with the mosaic I made. To get a general structure I made it flat and it had no real dimension so I could get a sense of color and width/height of the body.

After this I tried to think of how I could make the bunny more 3d. I did so by having it’s ears go out on both sides, it’s pink nose protrude from its face, its legs come out, and adding back legs as well.

This is our 2D model of the Great Blue Turaco bird, which is made out of flat square lego pieces. We decided to choose this bird because of its role in traditional stories of being able to pass messages from humans to spirits. For our 2D model we focused on the side of the bird, so that we could include the full tail and head feathers, which are important features of the bird. During our process of creating our bird on the lego board, we found that a diagonal pattern made it easier to create the rounded shape that the bird has. On our 2D model everything seemed very flat, like the eye, head feathers, and legs, so it was exciting to see how we could build the bird as a 3D model an make it come to life.

While building our 3D model out of block legos, we decided to start by building the head to make it proportional with the body. We wanted to be very detailed in our design, so we added multiple layers and colors to add depth. For our wings, we made them where there was a moveable joint so that they could move up and down like actual wings. The tail was quite difficult to make because of its length compared to the bird, but we did our best to make it as similar to the bird’s tail as possible. Our 2D and 3D models were not the same and not exact to the actual bird, but that is the fun part about creating models and seeing how it changes.

1 Like

Jade and Yujin

For our 3d model, Yujin and I decided to continue with our African impala. This 3D version was a lot harder to create than a 2D model. In order to make its figure we would need several brown Lego pieces, which were not too common to find. In researching what African impalas look like, we noticed this species tends to have almost a sunburnt back, with the upper body being dark brown, and the lower body lighter brown. We tried to recreate this in our 3D impala the best we could by using a 4x3 brown block at the top of its back.

Yujin made the belly part of the impala with Lego pieces that I can only describe as claws, but upside down, to make a smooth underbelly. We paid special attention to the head because we knew that part would be what people could look at and know we were making an impala figure.

We got crafty with Lego pieces of different shapes, including using rhombus-shaped blocks to make the horns and the ear tips. We are satisfied with how this is coming out!